Arm Tattoo Placement: Views, Sleeves and Future Plans
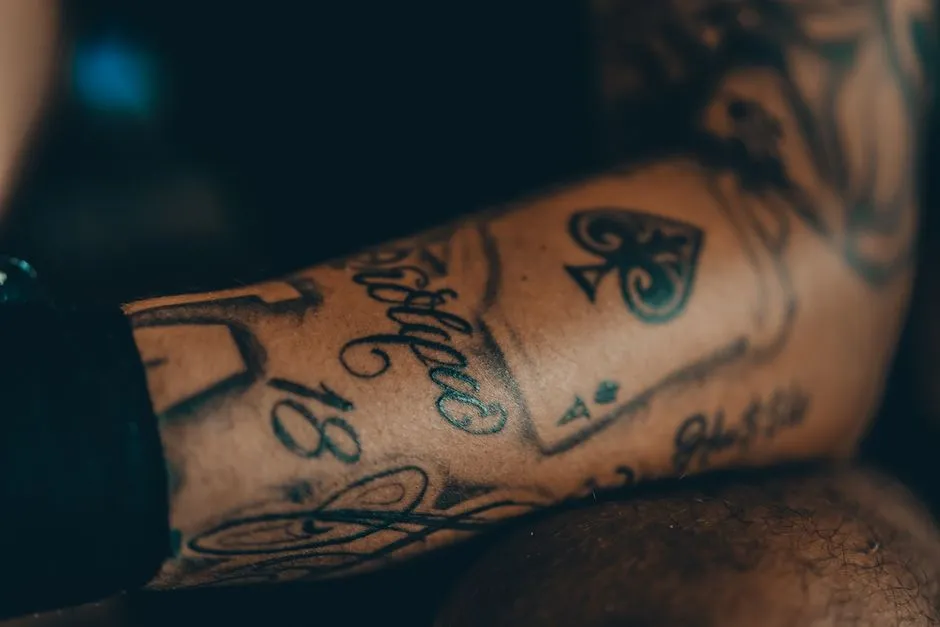
- How should you choose arm tattoo placement?
- What are the main arm placement options?
- How do the shoulder and upper arm frame a design?
- Should a forearm tattoo face you or face outward?
- Will your clothes cover the whole tattoo?
- Why should you look at more than one mock-up view?
- What changes if you might want a sleeve later?
- What would a useful placement brief look like?
- Which skin concerns need professional advice?
- Sources
How should you choose arm tattoo placement?
Choose arm tattoo placement by deciding which view matters, what your clothes must cover and whether the design may join a sleeve later. Compare the upper arm, inner and outer forearm, and shoulder with your arm relaxed and moving. Ask your artist to check the actual size and direction on your body before tattooing. Keep moles outside the design and seek a dermatologist's advice about concerning skin changes.
“Somewhere on my arm” is a useful starting point. The next step is more specific: where should the main image sit, what should remain visible from the side, and where should the design stop? Our whole-body placement guide introduces the broader choice of location. This guide helps you prepare an arm-specific brief.
The comparisons below are design considerations and editorial planning suggestions. They are not promises about pain, healing speed or how long a tattoo will stay sharp.
What are the main arm placement options?
Use these names to describe a starting area, then point to the exact spot at the consultation. A label such as “inner arm” can leave the artist unsure whether you mean above or below the elbow.
| Area | What to identify | A useful design question | A practical check |
|---|---|---|---|
| Shoulder cap | The rounded top of the arm | Should the image centre here or continue onto the upper arm? | Look from the front, side and back |
| Outer upper arm | The outside between shoulder and elbow | Which part should be the main view? | Check the lower edge against your actual sleeves |
| Inner upper arm | The upper-arm side nearest your torso | How much should appear with your arm resting beside you? | Compare the resting and raised-arm views |
| Back of upper arm | The rear-facing upper-arm area | Is the rear view intentional? | Have someone help you inspect it |
| Inner forearm | The palm-side forearm area | Which way should lettering or an upright image face? | Look with the palm turned up and the arm relaxed |
| Outer forearm | The opposite side of the forearm | Should the subject stay in one view or turn around the arm? | Check where its edges disappear from view |
| Elbow or wrist boundary | Where the proposed design reaches a joint area | Should it end, leave space or continue? | Discuss the edge as part of the whole composition |
This is a vocabulary map, not a ranking. You may prefer an image that is partly hidden when your arm rests, or one that reveals itself as you turn. State that preference instead of asking the artist to guess it.
How do the shoulder and upper arm frame a design?
Start with the part of the image you care about most. If it is a face, emblem or flower, decide whether you want that feature presented mainly from the side, the front or across the shoulder. Then ask how the surrounding elements would connect to it.
Artist Asil Argun's placement guide treats the relationship between the motif and available area as a design question: a long image, a broad subject and a composition containing several elements need different solutions. He also recommends checking where important features disappear around a limb and what happens near a bending joint. Those are useful questions for an upper-arm consultation, where one photograph can conceal the rear half of the proposal.
Our suggestion is to name the main view first. “I want the bird's head clear from the side, with the wing turning toward the back” is more informative than “make it fit my bicep.” The artist may propose changing the drawing, size or angle to achieve that effect.
For a small standalone piece, you can instead ask for a deliberate margin of bare skin around it. You do not have to fill an entire area simply because it is available. Our small tattoo ideas guide can help you describe the kind of motif you want.
Should a forearm tattoo face you or face outward?
Orientation means which way the design reads. It matters particularly for words, dates, portraits and anything with an obvious top and bottom. Decide it explicitly before approving the placement.
Set Sail Tattoo Studio's orientation guidance favours designs that read upright to an outside viewer when the arm hangs down. The studio warns that a wearer-facing tattoo can complicate the arrangement of later tattoos. This is the studio's aesthetic advice, not a rule about who a tattoo is “for.”
Discuss the resting-arm view alongside the view when you lift your forearm. Ask why the artist prefers one orientation and how it would relate to future work. Explain any different preference you have before agreeing the direction.
Lettering deserves its own check: read the exact words and confirm their direction in the proposed position. A pleasing overall shape does not answer those questions for you.
Will your clothes cover the whole tattoo?
Decide whether you need complete coverage or simply prefer an upper-arm location. Those are different requirements. “Mostly under a T-shirt” may be acceptable to one person and a failed placement brief for another.
Try the clothes that matter to you and note where their edges sit as you reach, sit and bend your arm. A favourite shirt, uniform or sleeveless top each gives you a different boundary to discuss. Our recommendation is to record the requirement in plain language: “No part below this sleeve when I reach forward,” for example. Let the artist assess whether the design can work within it.
Appointment clothing is a separate decision. Gravity Tattoo Studio's clothing guide recommends loose sleeveless clothing for upper-arm work and avoiding tight sleeves or narrow armholes. For forearm and wrist work, it advises removing watches and bracelets. Its general advice is to check that clothing exposes the area easily and remains comfortable on the way home.
Do not assume a coverable placement tells you anything about an employer's rules. If a policy matters to your decision, obtain the applicable wording before settling the location.
Why should you look at more than one mock-up view?
A close photograph can show a drawing clearly without showing how it sits on the whole arm. Ask for enough context to understand both.
The Fireside body-mapping lesson published by Mad Rabbit describes using photographs from different angles and an individual body map when developing a sleeve. It also explains that a digital layout may need adjusting when the client comes into the studio. The practical lesson for a client is that a screen preview supports discussion; the artist still has to assess the placement on the body.
For your consultation notes, separate what you can see from what you still want explained:
- Main view: the part of the drawing you want to read first.
- Other views: any element you want visible from the side or rear.
- Movement: a question about what changes when your arm bends or turns.
- Edges: where the design meets clothing, an existing tattoo or an area you want left clear.
You do not need to solve the artist's mapping process yourself. Your contribution is to explain what matters in the finished composition, including something the first preview has missed.
What changes if you might want a sleeve later?
Mention possible future work before the first piece is placed, even if you have not chosen its imagery.
Argun's sleeve planning guide distinguishes a connected composition from a patchwork collection of separate tattoos. It discusses the locations of focal points, open areas, inner-to-outer connections and the project's stopping points. In that framework, planning a sleeve does not mean filling every gap with ink.
Use that distinction to describe your preference. Would you like several separate pieces with visible space between them, or one composition that continues around the arm? If you have existing tattoos, show the whole arm as well as close views. Ask the artist which spaces they would reserve and which decisions can reasonably wait.
Our suggested question is: “If I keep this tattoo exactly as proposed, where could the next substantial piece go?” A useful answer might be a sketch, an explanation of the remaining areas or a suggestion to reposition the current idea. It should help you understand the choice before you make it.
What would a useful placement brief look like?
These are hypothetical examples to show how personal priorities can produce different briefs. They are not reports of clients or tested tattoo designs.
A portrait you want covered: “I would like the portrait on my upper arm. It must stay beneath this shirt's sleeve. The face matters more than the background. Please show me whether that boundary leaves enough room, and what you would simplify if it does not.”
A word you want to see: “I am considering my inner forearm. I want to discuss the reading direction while my arm is down and when I lift it. I have not decided about future tattoos, so please explain how each orientation could affect the next piece.”
A first piece for a possible sleeve: “I like this botanical subject, but I may want separate pieces around it later. Please show me the space you would leave on the inner and outer arm. I would rather agree the arrangement now than decide the gaps afterward.”
Each brief names a priority and leaves a question for the artist. Bring references for the subject and style, not an instruction to reproduce another person's tattoo. For help assessing the working relationship, see our guide to choosing a tattoo artist.
Which skin concerns need professional advice?
The American Academy of Dermatology recommends choosing skin free of moles because tattooing can make early signs of skin cancer harder to see. It also advises seeing a dermatologist about reactions or changes in tattooed skin. Do not treat a design discussion as a medical assessment.
After tattooing, spreading redness, worsening pain, pus or fever needs prompt attention: see a doctor right away and notify your tattoo artist. The AAD's reaction guidance gives the medical routing; the FDA also advises notifying the artist when a reaction occurs. Do not wait for the artist's reply before seeking medical care.
Aftercare content on this site reflects widely established healing practice — gentle washing, fragrance-free moisturizer, and keeping fresh tattoos out of pools, open water, and direct sun. It is general information, not medical advice. If you see signs of infection (spreading redness, worsening pain, pus, or fever), contact your tattoo artist and see a doctor. Minimum age and consent laws for tattooing vary by country and region — check your local rules.
Sources
- Asil Argun: Tattoo Placement Guide.
- Set Sail Tattoo Studio: Upside-Down Tattoos.
- Gravity Tattoo Studio: What to Wear When Getting a Tattoo.
- Fireside lesson published by Mad Rabbit: Body Mapping for Tattoo Sleeves.
- Asil Argun: Sleeve Tattoo Planning Guide.
- American Academy of Dermatology: Caring for Tattooed Skin.
- American Academy of Dermatology: Tattoo Skin Reactions.
- FDA: Think Before You Ink.